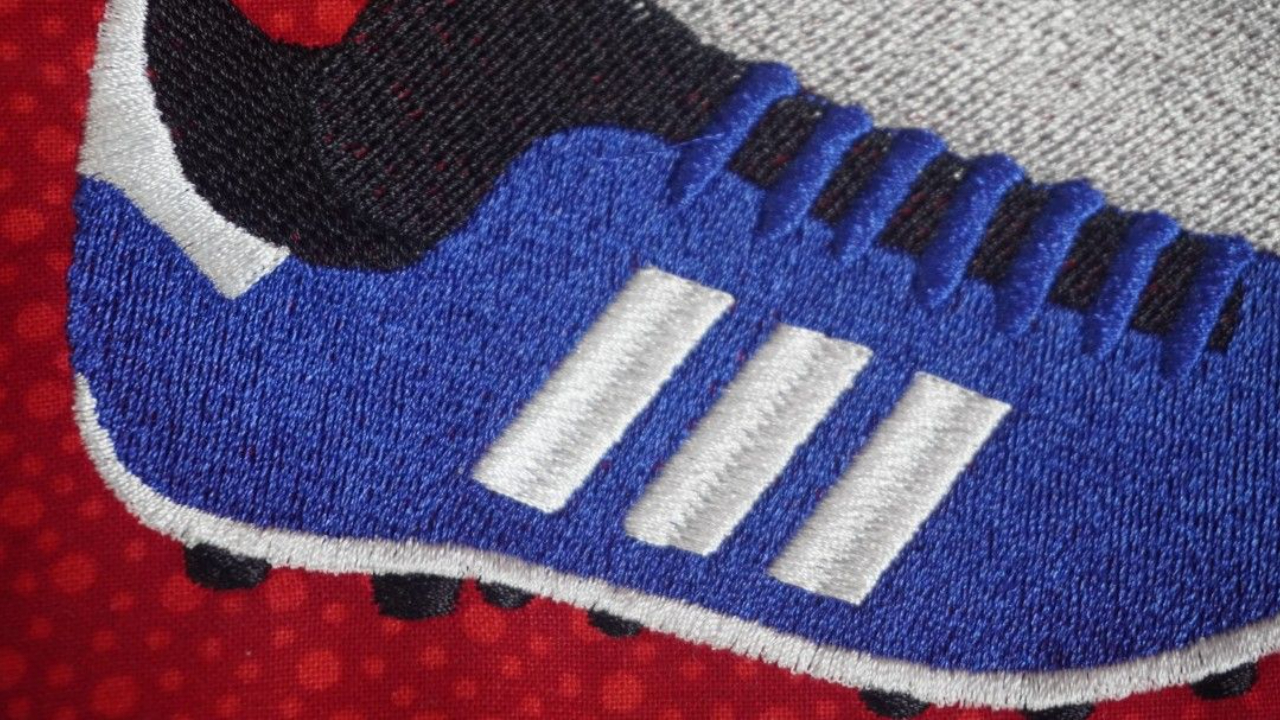
Exploring 3D Embroidery Effects Beyond Puff: Techniques and Tips
Jul 01, 2025Want to take your embroidery to the next level? 3D embroidery isn’t just about puff foam—it includes layering techniques, stitch density tricks, and thread manipulation to create eye-catching, textured designs.
In this guide, you'll learn:
✅ Different types of 3D embroidery effects
✅ When to use layering, raised satin, and foam techniques
✅ Best practices for achieving professional results
Let’s dive in! 🚀
🧵 What is 3D Embroidery?
3D embroidery is a technique that adds texture and raised elements to embroidery designs. It goes beyond traditional stitching by using:
🔹 Puff Foam → Creates thick, raised lettering and bold designs
🔹 Layered Stitching → Adds texture using overlapping stitch patterns
🔹 Raised Satin Stitches → Builds up thread height for a padded look
🔹 Trapunto & Quilting Effects → Uses batting for a soft, embossed style
🔹 Thread Sculpting → Manipulates thread angles for a textured finish
Each of these techniques offers unique effects that enhance embroidery projects.
📌 The Different 3D Embroidery Techniques
1️⃣ Puff Foam Embroidery
✅ Best for: Bold text, sports logos, caps
✅ How it works: Foam is placed under satin stitches to create a thick, raised look
✅ Key Settings:
✔ Increase stitch density → To fully cover the foam
✔ Use a wide satin stitch → Avoid narrow details
✔ Choose foam thickness → 2mm to 3mm for different effects
📝 Pro Tip: Use a heat gun to melt excess foam for a cleaner finish!
2️⃣ Layered Stitching for Depth
✅ Best for: Complex designs, shading effects, textured art
✅ How it works: Multiple stitch layers create dimension and depth
✅ Key Settings:
✔ Use different stitch angles → Enhances the illusion of height
✔ Layer underlay stitches → Helps raise elements without foam
✔ Combine satin, fill, and run stitches → For detailed textures
📝 Pro Tip: Layering is ideal for fur, hair, and fabric textures in embroidery!
3️⃣ Raised Satin Stitch (Thread Stacking)
✅ Best for: Borders, letters, logos
✅ How it works: Multiple satin stitches stack on top of each other for a raised look
✅ Key Settings:
✔ Increase stitch density → Prevents gaps in the design
✔ Use wider columns → Adds volume
✔ Reduce underlay → Too much underlay can flatten the effect
📝 Pro Tip: Perfect for monograms and bold typography without using foam!
4️⃣ Trapunto & Quilting Effects
✅ Best for: Soft, padded embroidery, quilts, home décor
✅ How it works: Batting or extra stabilizer is placed under the fabric to create a quilted look
✅ Key Settings:
✔ Use light-density fill stitches → Allows fabric to puff up naturally
✔ Outline shapes with a running stitch → Defines the quilted areas
✔ Use a thicker stabilizer → Adds more height
📝 Pro Tip: Trapunto is great for pillows, bags, and soft embroidery projects!
5️⃣ Thread Sculpting for High-Relief Designs
✅ Best for: Artistic embroidery, textured patterns
✅ How it works: Manipulates thread angles and density to create visual effects
✅ Key Settings:
✔ Use manual stitch placement → Allows custom texture
✔ Vary stitch angles → Enhances dimension
✔ Use thicker threads → Helps achieve a more prominent effect
📝 Pro Tip: Thread sculpting works well with metallic and variegated threads for added shine!
🔍 Troubleshooting Common 3D Embroidery Issues
| Issue | Cause | Solution |
|---|---|---|
| Foam peeks through stitches | Stitch density too low | Increase density or switch to thicker foam |
| Raised satin looks uneven | Inconsistent tension | Adjust thread tension, reduce underlay |
| Layers look too flat | Too much underlay | Use light underlay or none for raised effects |
| Fabric puckers around design | Not enough stabilization | Use cut-away stabilizer for better support |
📝 Quick Quiz: Test Your 3D Embroidery Knowledge!
1️⃣ What is the key to successful puff foam embroidery?
A) Using narrow satin stitches
B) Increasing stitch density and using wide satin stitches
C) Reducing the amount of stitches
2️⃣ What is layering used for in embroidery?
A) Creating depth and texture
B) Making designs smaller
C) Removing underlay
3️⃣ Which stitch technique creates a sculpted, high-relief effect?
A) Trapunto quilting
B) Raised satin stitches
C) Thread sculpting
4️⃣ What’s the best way to fix foam peeking through embroidery?
A) Use less foam
B) Increase stitch density
C) Lower the tension
👉 Drop your answers in the comments! ✅ (Answers: 1-B, 2-A, 3-C, 4-B)
Final Thoughts: Elevate Your Embroidery with 3D Effects!
Whether you're adding bold puff lettering, raised satin accents, or sculpted textures, mastering 3D embroidery can make your designs stand out like never before.
🎯 Want more embroidery tips? Sign up for our newsletter and get free embroidery guides, expert tips, and troubleshooting solutions delivered to your inbox!
💬 Have you experimented with 3D embroidery? Share your experiences in the comments! 👇
Want to create embroidery designs like a pro—fast? Join our FREE course to master auto-digitizing, refine your settings, and complete your first project with Hatch Embroidery 3. Enrollment opens soon—don’t miss out!
Stay Inspired with Embroidery Tips & Updates!
Join our mailing list to explore embroidery tips, software techniques, and updates from the Embroiderfy team. Your privacy is always our priority.
Your email address will only be used to send you updates, tips, and offers from Embroiderfy. We respect your privacy and will never share your information with third parties. You can unsubscribe at any time.

